This tutorial assumes you have deployed any version Metabase already. You'll also need the credentials for the data source you're trying to filter access to. These usually include host IP, port, username, password and database name, but will vary depending on your data source type.
This tutorial takes about 30 minutes to complete and you'll be ready to filter data access for as many Metabase users as you need. It works with any Metabase versions, except Metabase Cloud, since it does not allow custom drivers.
Part 1: Setting up PermissionLayer
Register to PermissionLayer
Add data sources and permissions
Get the admin API key
Download the driver
1.1 Register to PermissionLayer
Go to PermissionLayer's Login screen and click "Create an Account". You'll be prompted to enter basic register information, such as your email and password. We offer a 30-day trial, so you won't need to enter your credit card information upfront.
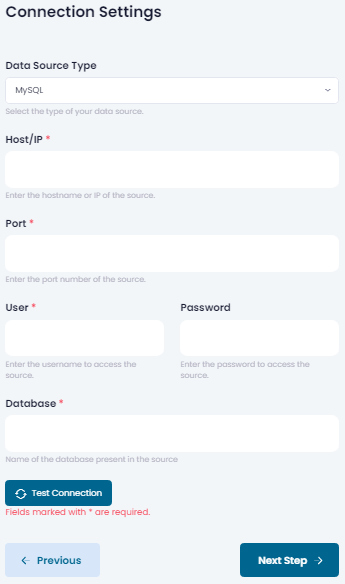
1.2 Add Data Sources and Permissions
Once logged, you can add your data sources and define permissions. You will need at least one permission to add users because they won't be able to access any data without one.
You can do this now or at any time before adding users. If you're testing PermissionLayer, we recommend using a test database and a simple permission, to get things rolling. You can always come back and update your permissions.
image
1.3 Get the Admin API Key
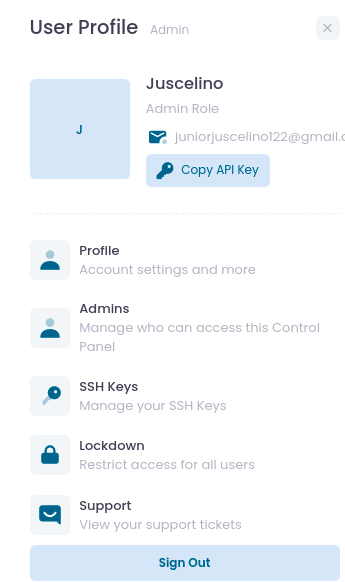
To access data from PermissionLayer in Metabase, you'll need to create an admin API key. To do this, you can click the User menu on the top right of the screen and navigate to "Admins".
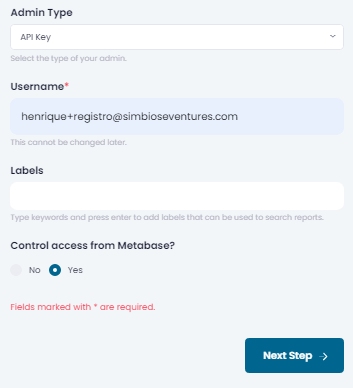
There, you'll need to Add a New Admin. Select the "API Key" admin type and enter any unique username you prefer. You can also add labels to better organize admins in your Admin List.
After filling in this info, check yes in "Control access from Metabase". This will identify this API key as a "Metabase Admin Key" and ensure that Metabase users' queries are filtered by the permissions set for each user in PermissionLayer.
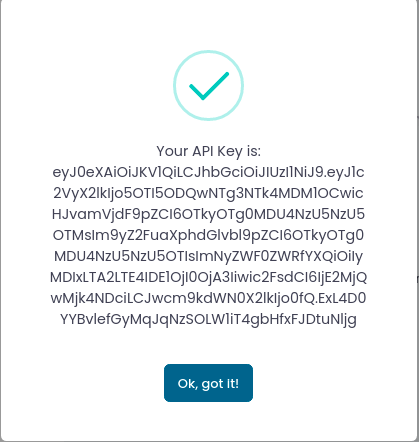
Important: This API Key is only shown once when it is created due to security reasons. Be sure to copy it to a safe place after it is shown on your screen. You can create as many keys as you need.
1.4 Download the driver
Now, download our Universal Metabase Connector. You'll use it in conjunction with your Admin API Key to connect your Metabase server to PermissionLayer.
Part 2: Connect Metabase to PermissionLayer
Install the connection driver
Use the admin API key to connect Metabase to PermissionLayer
Get users' Metabase IDs
2.1 Install the connection driver
Put the Universal Metabase Driver in your Metabase plugins folder. The standard location for this folder is [root]/plugins of your Metabase installation folder. If this folder does not exist, you'll need to create it and place the driver there. If you have a different folder for your plugins, use that folder. You can set your plugin folder using the variable MB_PLUGINS_DIR=./plugins.
You can find mode information about how to install custom connectors in Metabase's documentation.
2.2 Connect Metabase to PermissionLayer
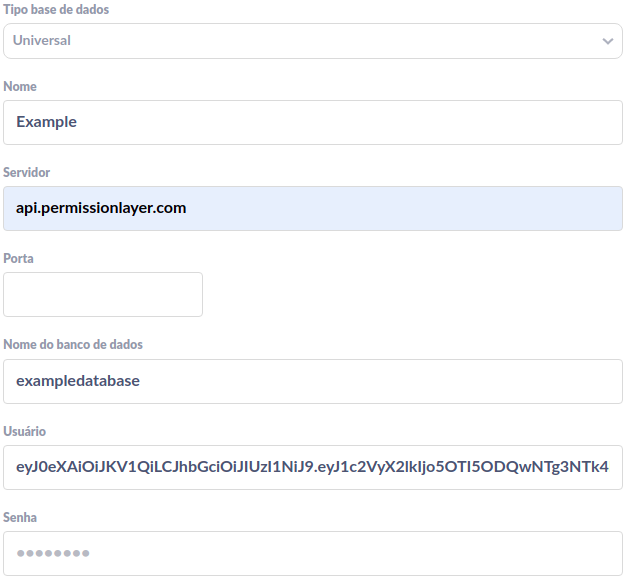
After placing the driver in the correct folder, add a new database in Metabase. Use the following credentials:
Database type: Universal
Host: api.permissionlayer.com
Port: [Empty]
User: [You admin API key]
image
Now your Metabase Admin account can access data from sources added to PermissionLayer. All that is left is to register your users. You're nearly done!
2.3 Get your Metabase users' IDs
You'll use Metabase's API to get your users' IDs.
First, generate a token by making a POST request to /api/session, using your admin email and password.
You will get "id":"your token" as a response. To get the users' data, make a GET request to /api/user, with your token as a header.
This will return a list with your users and their IDs.
Metabase's host and port may differ from this example. You can find more information in Metabase's documentation For further questions, you can check Metabase's API documentation.
Part 3: Invite people and collaborate
Add users with Metabase IDs to PermissionLayer
Make science!
3.1 Add users with Metabase IDs to PermissionLayer
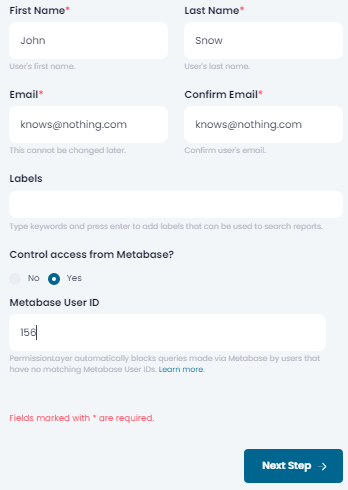
Now, back to PermissionLayer, you'll need to add your users with their Metabase User IDs. This will allow PermissionLayer to relate queries from Metabase with the permissions you set for these users.
image
Go to Users and click Add New User. Enter that user's details and be sure to check "Control access from Metabase", adding the correct Metabase User ID in the textbox that appears.
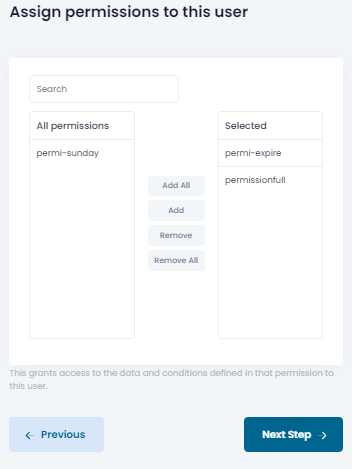
Next, assign as many permissions as you want for this user. You need to assign at least one permission to create a user. These permissions will define what data this user can access, besides other security options.
image
This user will receive an email with his API key and instructions to configure our drivers in other data tools. Though they may choose to, they won't need to do anything else to access data in Metabase.
3.2 Make science!
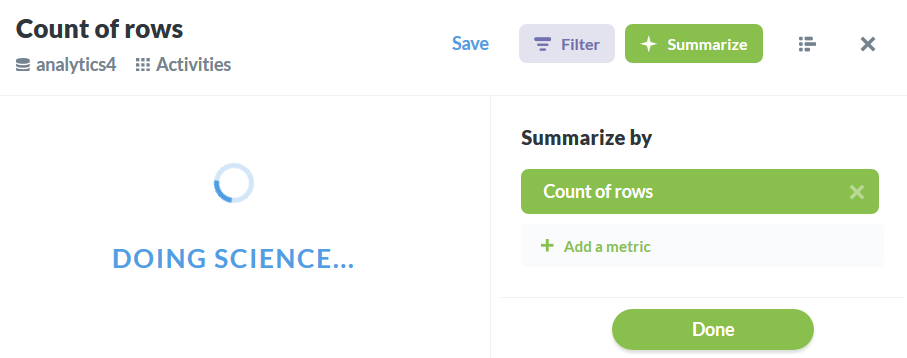
YOU'RE DONE! Now tell your users that they can access data in Metabase and check the Queries and Auditing reports. You'll get updated information about what queries users and making, besides what users can access what data via PermissionLayer.
Now go make some science, and turn your data into insights!